|
With more and more people setting up home theaters, AV receiver connection issues have become quite common. An AV receiver acts as the central hub connecting all of your audio/video devices like TV, Blu-ray player, streaming devices, gaming consoles, etc. Setting them up correctly requires understanding cable connections and ensuring proper configuration. This can be tricky and issues often arise. However, with some troubleshooting and the help of av diagram software, many common connection problems can be resolved. In this blog post, I will discuss some of the most frequent AV receiver connection issues people face and provide steps to troubleshoot them. I have divided the post into relevant sections with headings and subheadings for easy navigation.  As mentioned earlier, an AV receiver lies at the heart of any home theater setup. It takes audio and video inputs from various devices and processes them before sending output to your TV and speakers. While this allows for a unified experience, it also introduces potential points of failure if not set up correctly. Let's take a look at some common issues. HDMI Connection Issues HDMI has become the most popular connection type for audio/video due to its ability to carry both video and multiple audio channels on a single cable. However, it also faces compatibility and configuration problems. HDMI Handshake Failure One common issue is HDMI devices failing to communicate properly during the initial "HDMI handshake". This results in no video or audio output. The common causes could be incompatible HDMI versions between devices, long or low quality cables, defective ports etc. Running an av diagram software can help identify potential version mismatches. No Audio Output over HDMI Sometimes the video signal passes but associated audio does not. This can happen if the receiver is not set to properly receive audio over HDMI or the connected device does not support HDMI audio transmission. The solutions involve configuring audio options on both devices. HDMI Input Not Detected In rare cases, the receiver may just not detect an HDMI input connection at all. Reasons could be a faulty HDCP (copy protection) handshake, a bad HDMI board on the receiver, or incompatibility between the receiver and the connected device. Rebooting all devices and trying different ports/cables are some workarounds. SoundBar Connection Trouble Many opt for a soundbar instead of speakers for its simplicity. However,Incorrect connection to an AV receiver is a major cause of audio/video issues. Ensuring the soundbar is connected to the correct HDMI ARC/eARC port and properly configured for it is important. Optical/Coaxial Audio Connection Issues While HDMI has become more prevalent, optical and coaxial connections are still used by some older devices to transmit multichannel audio. Common problems include incorrect configuration of these inputs, compatibility issues, or faulty cables. Configuration Mistakes Even if the connections are correct, issues can arise due to incorrect configuration settings on the receiver or connected devices. Things like selecting the right audio input source, enabling pass-through of specific audio formats etc. need attention. Spending time in the setup menus is worthwhile. Troubleshooting Tips Now that we understand the major issues, let's look at the general troubleshooting process: Inspect Connections Physically check all connections - make sure cables are firmly plugged in, there are no bent pins, and the right ports are being used. Reseat cables as a first step. Eliminate Other Variables Temporarily disconnect other devices to isolate the problem to a specific component. Also try a known good cable/port on another device as a test. Examine Device Settings Thoroughly go through audio/video setup menus on AV receiver and the problem device to ensure correct configurations. Check Firmware Outdated firmware can cause glitches. Check for and install available updates for the receiver and connected components. Consult Manual RTFM - the manual often has invaluable information about limitations, common issues and their fixes. Search it for clues. Get Help Online Visit manufacturer support sites and audio/video forums to find solutions others used. With details of the issue, often someone would have faced it before. As a Last Resort Try resetting the receiver to factory defaults if all else fails. Or contact customer support for further troubleshooting assistance. Preventing Future Issues While issues do happen, there are some proactive steps to avoid reoccurring connection troubles: Use High Quality Cables Invest in good, branded HDMI cables without loose connectors. Avoid very long cables prone to interfering noise. Protect HDMI Ports Keep ports clean and be gentle while plugging/unplugging cables to prevent damage over time. Keep Firmware Updated Set up automatic checks/downloads for new firmware on devices to fix bugs proactively. Label Cables and Ports Clearly identify cables and their functions to avoid future confusion during changes or troubleshooting. Avoid Excessive Device Switches Too many frequent changes between inputs on receiver or devices can sometimes lead to HDMI syncing issues. Layout Diagrams Maintain a physical or online layout diagram of equipment and their connections as a ready reference in case of issues. Conclusion With more home entertainment gear being used these days, AV receiver connections have become quite complex. However, taking some time to understand basic troubleshooting steps and using resources like av diagram software can help diagnose and solve most common problems. Regular inspection and maintenance also ensures long term smooth operation. I hope this post provided useful insights and steps to resolve frequent connection nightmares many AV enthusiasts face. Please feel free to reach out if you need any clarification or additional help with setup or configuration topics.
0 Comments
Rack mounting is an important consideration for any AV production studio or professional facility wanting to optimize workspace and equipment organization. Properly rack mounting AV equipment brings numerous benefits compared to simply placing units on shelves or surfaces. As any professional involved in av production software knows, having a neatly rack mounted infrastructure is essential for efficiency and productivity in the studio or production environment. 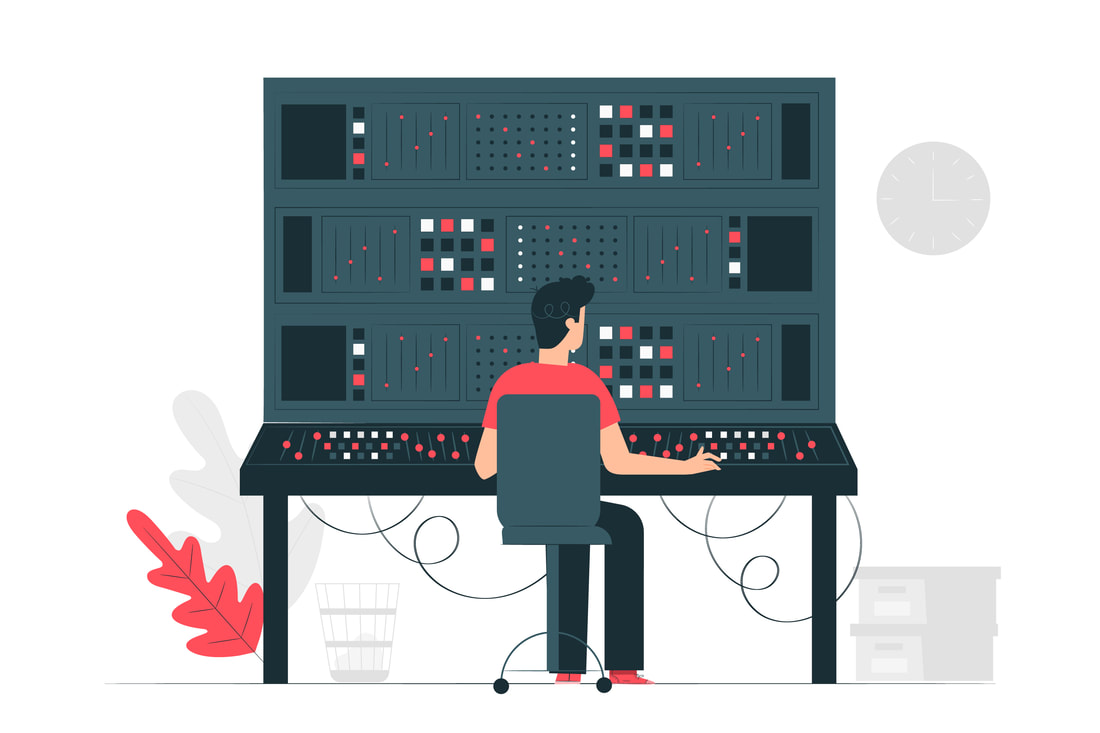 As an av design engineer, having the right set of tools is essential for efficiently and effectively installing audio visual systems. While the specific tools needed may vary depending on the type and scale of the AV project, there are some core tools that every AV installer should have in their toolkit. In this blog post, we will go through a comprehensive list of must-have AV installer tools, along with explanations of what each tool is used for and why it is important. 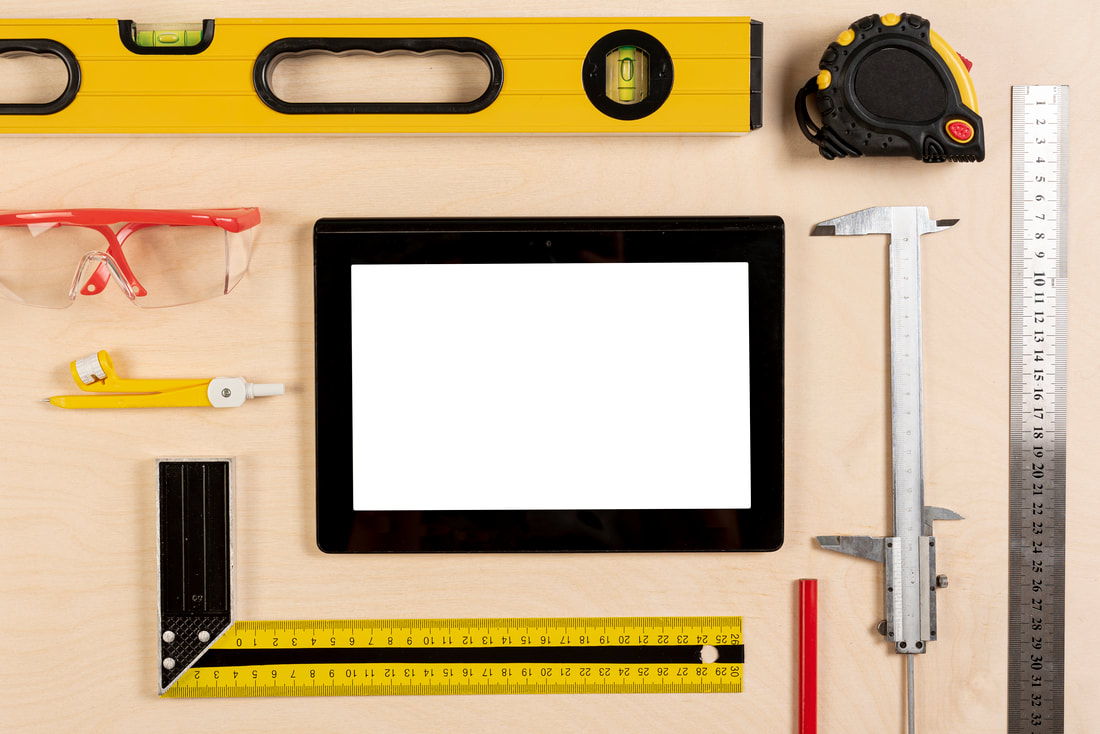 Proper Tooling is Key to Successful AV Installations Having the right tools for the job is incredibly important when it comes to AV installation work. Unlike some other trades, AV installation requires working with a variety of electronics, cabling, mounting systems and other precision components. Using the wrong tool can easily damage expensive equipment or lead to shoddy installations that don't function properly. That's why it's essential for av installers to choose tools specifically designed for AV work and to keep their toolkit well-stocked with core must-have items. In this guide, we'll outline the most important AV installer tools and the key functions they serve. Measurement and Layout Tools Tape Measure A good quality tape measure is a no-brainer must-have tool for any installer. AV installation often involves precisely measuring installation locations, cable runs and component placements. Get a 25' or 30' tape measure with both standard and metric measurements for maximum versatility. Laser Distance Meter A laser distance meter provides fast, contactless measurements that are great for laying out speaker or display placements. Measure distances up to 50-100 feet with accuracy to within 1/8". Useful for measuring large rooms prior to installation. stud Finder An essential for locating wall studs to securely mount TVs and speakers. Select a model that detects non-ferrous metal as well as wood studs behind drywall. Level An accurate level is needed to ensure flat mounts and proper speaker/screen alignment. Choose a quality 24-48" bubble level or a laser level for larger installation layouts. Markup Tools Utility Knife A good folding utility knife with extra blades is versatile for opening boxes and scoring drywall. Look for a locking blade feature for safety. Marker/Pencil Take notes, label cables and lightly mark installation spots on surfaces. Use a pencil for marking surfaces where ink stains could be an issue. Tape Measure A good quality tape measure is a no-brainer must-have tool for any installer. AV installation often involves precisely measuring installation locations, cable runs and component placements. Get a 25' or 30' tape measure with both standard and metric measurements for maximum versatility. Laser Distance Meter A laser distance meter provides fast, contactless measurements that are great for laying out speaker or display placements. Measure distances up to 50-100 feet with accuracy to within 1/8". Useful for measuring large rooms prior to installation. stud Finder An essential for locating wall studs to securely mount TVs and speakers. Select a model that detects non-ferrous metal as well as wood studs behind drywall. Level An accurate level is needed to ensure flat mounts and proper speaker/screen alignment. Choose a quality 24-48" bubble level or a laser level for larger installation layouts. Mounting and Assembly Tools Cordless Drill/Driver A must-have for fastening mounts and other installation hardware. Choose a model with adjustable torque and speed settings for finer control. Impact Driver Quickly drives screws, bolts and lag shields into tough materials like concrete or brick with less stripping risk. Assorted Screwdriver Set Philips, flathead, Torx and Hex screwdriver tips for assembly and installation tasks. Look for ergonomic cushion grip handles. Socket Wrench Set Standard and metric socket sizes along with ratcheting action for working with bolts and assembly hardware. Deep well sockets handy for tight spaces. Hammer Essential for gently tapping in wall anchors or stakes for outdoor installations. Look for a scissor or claw design for versatility. AVIS Cable Stapler/Nailer Specially designed for fastening low-voltage cables neatly and securely in place. Air powered models drive staples quicker than manual. Cable Cutter High leverage handles cleanly cut through various cable types up to CAT6. Replaceable blades stay sharp for long-term use. Look for a model with cutting depth marking. Cable Stripping Tool Precisely scores and removes cable sheathing without damaging conductors inside. Choose auto-adjusting or interchangeable blade styles for different gauge wires. Crimping Tools Proper crimping is critical for reliable connections. Get an all-in-one crimper with dies for RJ45, BNC, banana plugs and spade/fork terminals. A wire stripper integrated into the handle saves steps. Connectivity Tools Multimeter Measures voltage, current, resistance and continuity for basic component troubleshooting. An essential diagnostic tool for any technician. Fiber Optic Ensheathing Tool/Cleaver Neatly scores and splits optical fiber for clean terminations. Choose auto-stripping models or interchangeable blade styles. Fiber Optic Terminating/Polishing Kit Includes ferrule block/holder, polishing films and pads for polished connectors. Look for self-contained kits with storage case. RJ45 Crimping Tool As mentioned above, crimping quality is key for rock solid twisted pair connections. An inexpensive crimper saves steps versus pre-made cables. BNC Crimping Tool Similar in design to RJ45 crimper but sized for durable video connections. Quality crimp joints increase reliability. Test Equipment Multimeter Measures voltage, current, resistance and continuity for basic component troubleshooting. An essential diagnostic tool for any technician. Fiber Optic Scope Inspects fiber end-faces and core alignment for troubleshooting connection issues. Choose USB or WiFi enabled models for documentation. Tone Generator/Probe Emits and detects specific frequencies for quickly tracing cable runs. Helpful when cabling in plenum ceiling areas or pre-existing routes. Cable Certification Tester Checks installed copper cabling for proper termination, shorts, reversed pairs and bandwidth according to standards. Ensures reliable performance. Audio Signal Generator Outputs various test tones and patterns to check speaker installation and amp/receiver functionality prior to use. Video Pattern Generator Displays alignment grids, color bars and other test patterns essential for tuning projector installs and calibrating multi-display video walls. HDMI sync generation common on pro models. Certification, Safety and Auxiliary Tools AVIXA CTS Certification While not a physical tool, certification demonstrates expertise to clients and employers. Study materials included with exam helps stay up to date on latest trends and standards. Basic First Aid Kit Bandaids, antiseptic and gloves essential for treating minor cuts, scrapes and burns on the jobsite. Safety Glasses Mandatory eye protection from debris, dust and potential struck-by hazards in construction zones and equipment work. Dust Mask Required breathing protection when working around fiber installations or old materials that can release hazardous particles into the air. Gloves Protect hands from cuts, abrasions, chemicals and heat when handling materials or working in tight/dirty places. Consider insulation rated gloves for electrical work. Small Tool Box/Bag Convenient carrying case to keep all tools organized, safe and within reach on jobsites or in-vehicle. Roll cab and backpack styles suit different transport needs. Multimeter Measures voltage, current, resistance and continuity for basic component troubleshooting. An essential diagnostic tool for any technician. Fiber Optic Scope Inspects fiber end-faces and core alignment for troubleshooting connection issues. Choose USB or WiFi enabled models for documentation. Tone Generator/Probe Emits and detects specific frequencies for quickly tracing cable runs. Helpful when cabling in plenum ceiling areas or pre-existing routes. Cable Certification Tester Checks installed copper cabling for proper termination, shorts, reversed pairs and bandwidth according to standards. Ensures reliable performance. Audio Signal Generator Outputs various test tones and patterns to check speaker installation and amp/receiver functionality prior to use. Video Pattern Generator Displays alignment grids, color bars and other test patterns essential for tuning projector installs and calibrating multi-display video walls. HDMI sync generation common on pro models. Conclusion In conclusion, having the right set of AV installation tools can make all the difference in productivity, efficiency, safety and installation quality. While the specific tools needed may vary depending on the type and scale of projects, the core set of tools covered here should enable technicians to tackle the vast majority of AV design, cabling, mounting and troubleshooting tasks. Remember to keep tools properly maintained and accounted for on jobsites. With the proper tooling foundation in place, av design engineers and installers can turn their focus to delivering showcase AV systems that will impress clients for years to come. When it comes to installing or upgrading complex audio visual systems in your home, office or other commercial space, choosing the right AV installer is crucial. A qualified professional will ensure your new AV equipment is properly installed and configured using the correct audio visual software and technologies to deliver an exceptional experience. However, with many companies offering AV installation services, it can be difficult to determine which one is the best fit for your needs. This guide will help you identify the key factors to consider when selecting a professional AV installer.  Experience and Qualifications
One of the most important things to look for in an AV installer is experience. An experienced installer will have worked with a variety of AV equipment, room layouts and customer needs over many projects. They will be familiar with industry best practices and standards as well as the latest audio visual software, tools and technologies. Ask potential installers how long they have been in business and how many similar projects they have completed. Also inquire about the technical qualifications and certifications of the installers who will be working on your project. Leading manufacturers like Samsung, Sony and Crestron offer certification programs to ensure installers have the required skills and training to properly install and configure their products. An AV installer with extensive experience and appropriate industry certifications will be able to complete your project smoothly and deliver high quality results. Project Management Skills Installing an AV system, especially in a commercial setting, requires excellent project management abilities. There will be many details, components and trade partners to coordinate such as ordering and receiving equipment, scheduling delivery and installation dates, pulling cables, configuring devices and more. Look for an AV installer with robust project management processes and experience managing complex installations from start to finish on time and on budget. Ask for references from past clients and check reviews online to get a sense of how well a potential company manages projects. Good communication, organization, responsiveness and accountability are key attributes of an installer that can ensure your AV project stays on track. Technological Expertise Along with experience, you'll want an AV installer that stays on top of the latest technologies and industry trends. Audio visual systems require an in-depth understanding of technologies like distribution systems, control systems, source devices, displays, streaming media and more. An expert installer will be able to evaluate your unique space, recommend the right components and design a customized solution tailored to your needs and budget. They should also keep up with new standards, innovations and integrations between technologies like digital signage, security systems, acoustic solutions and beyond. Ask installers what new technologies they are certified or trained in and how recently their expertise has been updated. Budgeting and Cost Estimates Creating a realistic budget and providing accurate cost estimates is essential for any AV project. Evaluate how responsive and transparent potential installers are regarding budget questions. Do they provide fixed quotes or hourly billing? Can they itemize estimates with clear explanations of parts, labor hours and additional potential fees? Ask for sample budgets and invoices from past comparable jobs to evaluate pricing approaches. Look for an installer with a proven track record for staying within estimates and communicating changes transparently if any unexpected issues arise. A reputable AV professional will be upfront about potential costs without surprises down the line. Troubleshooting and Support Even the best installed AV systems may encounter technical issues occasionally. Select an installer with robust long-term support commitments like on-site warranty periods, remote support options and rapid response times for service calls. Understand what types of issues are covered under any included support plans versus additional billable support options. Additionally, opt for an experienced team that takes a proactive approach to troubleshooting rather than just reactive fixes. Factors like system documentation, scheduled maintenance plans and personalized end user training help catch minor problems before they evolve into serious technical support needs. Strong post-installation support lowers long-term ownership costs and maximizes uptime for your AV equipment and users' experience. Customer Reviews and References When selecting an AV installer, value other clients' perspectives by checking third party reviews and requesting direct references. Google, Facebook, and specialty review sites can provide honest feedback on a company's service, communication and resolution of issues from past projects. Look for common trends in reviews and factors like problem resolution. It's also wise to ask potential installers for several past client references you can contact directly. Speak to previous customers about their experience through the full project lifecycle including contract sign off to get a realistic view of the company's strengths and if any issues arose. Verify references are given willingly and not reserved just for perfect projects. Positive reviews and references increase trust for the quality of work prospective installers can deliver. Creating an exceptional audio visual experience requires selecting the right professional installer to design, implement and support your system properly using appropriate audio visual software and tools. Thoroughly evaluating experience, qualifications, project management skills, technological expertise, pricing transparency, policies and reviews will help you choose an AV partner with extensive capabilities and a track record of delivering customer satisfaction on complex installations. Developing a strong relationship with an installer meeting these criteria will result in a smoothly run and successful AV project. With so many AV diagramming software tools available these days, it can be difficult to choose the right one for your needs. In this ultimate guide, we will explore the key features and benefits of different AV diagramming solutions. We will also provide tips on how to evaluate your requirements to select the best AV diagram software like d tools for your specific projects. 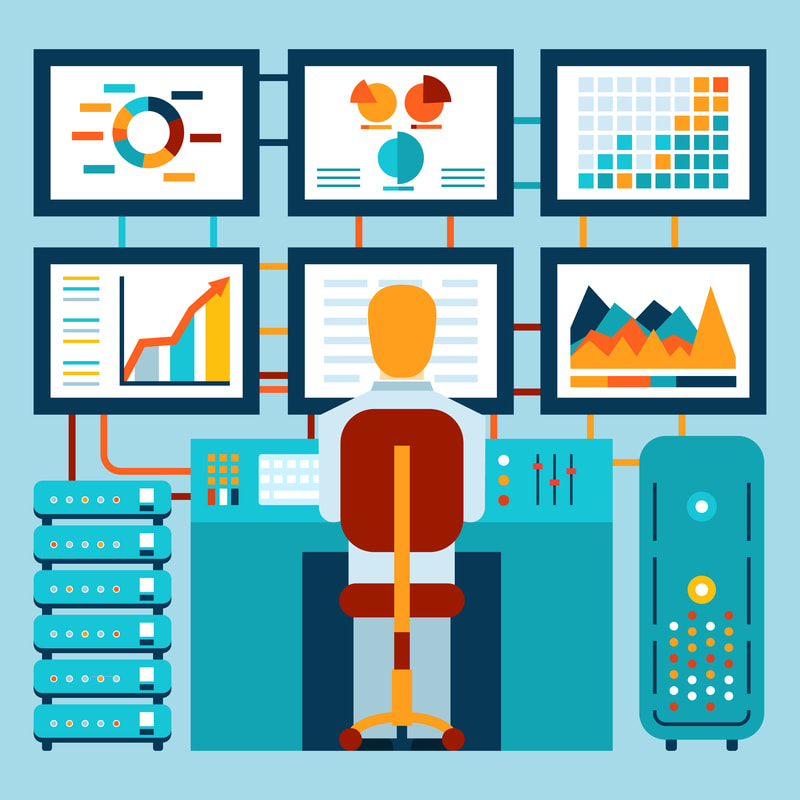 When planning any type of event, whether it is a conference, presentation, ceremony or other gathering, choosing the appropriate audio visual equipment is essential. The audio visual equipment you select can make or break your event by either effectively communicating your message or leaving your audience confused and distracted. In this blog, we will discuss the different types of AV equipment options, factors to consider when selecting equipment, and tips for choosing the best solutions for your specific event needs.  With so many options for audio visual (AV) equipment available today, choosing the right av installer and gear for your space can be an overwhelming task. Whether you are outfitting a home theater, conference room, or any other type of environment, there are several factors to consider to ensure you select equipment that meets your needs. In this blog post, we will discuss the key things to evaluate when purchasing AV systems and provide tips for making informed decisions.  Things to Consider for Your Space
The very first step is evaluating the space where the AV equipment will be used. Key factors include: Size of the Room The size of the room will dictate the type and power of equipment needed. Larger rooms will require more powerful speakers, subwoofers, and potentially a projector with greater lumens. For smaller rooms, more compact yet high-quality options may suffice. Seating Arrangement How the seating is configured impacts equipment placement. For a home theater, determine where the picture will be viewed from and possible sight line obstructions. Conference rooms require visibility from all angles. Light Control Rooms with lots of windows or no light blocking will need a brighter projector. Consider installing blackout shades or curtains for full dark rooms. Speakers may also be affected in very bright spaces. Existing Infrastructure Note any existing mounting points, cabling, outlets, and available space for equipment racks or cabinets before selecting devices. New construction may require additional work. Budget Set a budget to guide your selections. High-end gear providing cinema-quality experiences comes at a higher cost. Budget options still deliver excellent performance for more casual use. With an understanding of your specific space needs, the next step is assessing the core AV components required. Selecting Core AV Equipment Whether putting together a basic setup or higher-end cinema system, the following are essential items to consider: Display For video playback, this is the central piece. Evaluate screen size needs based on seating distance and room dimensions. Choose between projectors, TVs, and screens based on lighting, intended content, and budget. Speakers Evaluate 2-channel or multi-channel surround sound based on content. Consider speaker placement, power handling, and frequency response tailored for the room size. Adding a subwoofer enhances the low-end experience. Amplification A receiver is the hub to power speakers. Consider the number and type of speakers, room size, and future-proofing needs when choosing an amplifier. More powerful models drive larger or more speakers. Source Devices Determine what devices will be used like streaming sticks, Blu-ray players, game consoles, and cable/satellite boxes to feed content to the display. Ensure compatibility with other components. Cables and Connectors Plan for the necessary HDMI, speaker, optical, coaxial and USB cables to connect all devices. Consider future-proofing with the latest cable standards to support high resolutions like 4K. Mounts and Stands Choosing mounts for the display and speakers suitable for your specific room setup, infrastructure and aesthetics completes the essential gear checklist. With core equipment identified, the next step is considering additional features and technologies. Elevating the AV Experience While the basics cover the essentials, these extra features enhance functionality: Smart Home Integration Adding voice control through systems like Alexa allow hands-free operation of AV devices and lights from any room. Multi-Zone Capability Distribute audio throughout the home via additional amplifier channels and wireless speakers in other areas. Atmos/DTS:X Support Object-based audio takes the surround experience to an immersive new level with overhead/height channels for a theater-like feeling. 4K/HDR Compatibility Ensure all links and devices are HDMI 2.0/2.1 capable to unlock the full resolution and high dynamic range from Ultra HD content. Wi-Fi Streaming Built-in streaming apps and AirPlay/Chromecast support on A/V receivers wirelessly integrates streaming services. Once the necessary and preferred equipment is identified, the next step is to have an av installer properly install and calibrate it all. An experienced professional can ensure everything is set up optimally to deliver the best possible performance from the new gear. They will advise on equipment placement, run wiring discreetly, configure the whole system, optimize settings, and more. Their expertise results in the AV equipment functioning seamlessly as an integrated, high-performance solution tailored to the specific space. Putting it All Together To recap the process, evaluate your unique room needs, identify core AV components, consider extra features, develop a budget, then work with a professional av installer to purchase the right equipment and have it expertly installed and tuned. Home theaters, conference rooms, bars and more will be transformed into acoustically optimized entertainment zones through properly selecting, installing and calibrating an integrated audio visual system. While the options may seem endless, following these guidelines ensures making informed choices that satisfy your specific requirements for years to come. Conclusion Proper planning is key to choosing the right AV gear the first time. Assessing space limitations and priorities up front streamlines the selection process. With necessary and bonus features identified, working closely with an av installer guarantees everything functions optimally together as an integrated system. Their expertise installing, wiring and calibrating produces a top performing solution tailored precisely for the unique environment. Taking the time at the start results in optimal performance delivering amazing audiovisual experiences for years to come. Proper acoustics play a vital role in any successful audio visual design. Whether it is for a corporate presentation, a concert hall, or a home theater system, the acoustic treatment of the space is of utmost importance to ensuring high quality audio and an optimal user experience. In this blog post, we will discuss how acoustics impact audio visual systems and why they should always be a major consideration when planning any AV installation.  Understanding Room Acoustics
Before we get into the specifics of integrating acoustics into an audio visual design, it is important to understand some basic concepts of room acoustics. All enclosed spaces, from small home theaters to large auditoriums, have unique acoustic properties that are determined by factors like: Size and Shape: Larger rooms tend to have longer reverberation times than smaller rooms. Rectangular rooms create more reflections than square rooms. Surface Materials: Hard surfaces like stone, tile, glass and bare wood reflect sound more than soft, porous surfaces like carpet, drapes and acoustic panels. Furnishings: Objects in a room like chairs, sofas and display equipment can absorb or reflect sound depending on their material composition. HVAC Systems: Air ducts and ventilation can introduce noise into a space or inhibit proper acoustic treatment. These physical characteristics impact how sound behaves within an enclosed space through reflection, absorption and reverberation. Proper acoustic treatment aims to control these behaviors for optimal speech intelligibility and high quality audio reproduction. Factors that Impact an Audio Visual System There are several specific ways in which room acoustics can negatively impact an audio visual system design if not properly addressed: Echo and Reverberation In untreated rooms, sounds reflect off hard surfaces and linger, creating an unwelcome echo or reverberation. This disrupts speech intelligibility and muddy's the audio experience. Excessive Reflections Hard, parallel surfaces in untreated rooms cause sound to reflect off in multiple directions, distorting the stereo image and mixing frequencies in an unnatural way. Poor Clarity Reflections and reverberation obscure transients and details, diminishing intelligibility and thinning out audio. High frequencies are more greatly impacted. Distracting Resonances Certain room modes or standing waves can amplify undesirable frequencies, creating an irritating hum, ringing or other resonant coloration. Comb Filtering Multiple reflections overlapping with direct sound create comb filtering effects that thin out the frequency response, weakening bass and creating undesirable dips and peaks. Solutions Through Acoustic Treatment There are several effective acoustic treatment options that can remedy issues caused by room acoustics and optimize audio quality when integrated into an overall AV system design. Some examples include: Absorption Placing acoustic panels made of porous, fiberglass, or foam absorbing materials on first reflection points and perimeter walls helps reduce reflections and echo. Diffusion Textured or geometric diffuser panels scatter sound waves upon impact, softening reflections instead of absorbing them outright. This preserves spaciousness. Bass Traps Specialized porous traps placed in room corners absorbs low frequency standing waves for a tighter, more balanced bass response. Acoustic Panels Modular fiber panels mounted strategically on ceilings and above/below screens or speakers control flutter echo and high frequency reflections. Acoustic Fabrics Draping acoustic fabrics over entryways, behind seating areas or on wall/ceiling surfaces enhances absorption where solid panels can't be installed. Proper treatment controls distracting acoustics so the audio from an AV system projects as intended, with clear dialog, well-defined imaging and natural tonal balance throughout the listening/viewing area. Some further consideration is also required for large venues. Additional Considerations for Larger Spaces While the core acoustic treatment principles remain the same, additional factors must be addressed when designing audio visual systems for large performance or event spaces like: Auditoriums Lecture Halls Worship Spaces Concert Venues Reverberation Time Larger volumes require diffusive plus absorbent materials tuned to the specific room dimensions and intended use, whether for music, film, or speech. Seating Layout Seat absorption properties and layout arrangement impacts perception of audio from different areas of the room. Amplification Distributed speakers, delays and mixing are required to provide consistent coverage and avoid nasty reflections off hard surfaces like glass. Acoustical Modeling For spaces seating hundreds to thousands, computer modeling aids placement of treatments to smooth response throughout. HVAC and Construction Airflow, lighting trusses, HVAC ducts etc. must be addressed during design and construction to avoid unnecessary noise. By accounting for all the physical elements that shape sound behavior in large rooms, professional acoustical consultants ensure clear, spatial audio reproduction no matter the size of the audience of function of the AV system in its various operational modes. Conclusion In summary, acoustics should always be a serious consideration during the planning stages of any audio visual design project, from a dedicated home theater to large scale installations. Proper acoustic treatment tailored to the space helps overcome issues like echoes, resonances and reflections - allowing equipment, content and end users to shine. When acoustics and audio visual design work in harmony, the experience for presenters and audiences is dramatically enhanced. Failing to acknowledge room acoustics can seriously compromise system performance and user enjoyment. By devoting attention, resources and specialized expertise to acoustical integration, audio visual professionals can deliver acoustically optimized results. Surround sound systems have become a staple in many homes as people enjoy an immersive home theater experience. However, when deciding on a surround sound system, one must choose between a wireless or wired setup. Both have their advantages and disadvantages. In this blog post, we will do a detailed comparison of wireless vs. wired surround sound systems. Read Related Blog Here  Wireless Surround Sound Systems Convenience of Wireless One of the major advantages of a wireless surround sound system is the convenience it provides. With a wireless system, there is no mess of cables running all around the living room. This allows for much easier installation and setup. You don't have to worry about drilling holes in walls or finding the best route for cables. The wireless speakers and subwoofers can simply be placed around the room and connected to the receiver wirelessly. This makes Wireless ideal for renters or people who want the flexibility to move their speaker setup. Coverage Area Most quality wireless surround sound systems nowadays provide a good coverage range of over 30 feet. This allows the flexibility to place surround speakers further away without signal drops. Multiple users have reported being able to use wireless surround speakers in other parts of their house without issues. The coverage ensures a seamless surround sound experience no matter where you are sitting in the room. Disadvantages of Being Wireless The main disadvantage of wireless surround sound systems is the potential for interference issues. Since the audio signal is transmitted through the air using WiFi or Bluetooth, it is susceptible to interference from other wireless devices. Nearby baby monitors, cordless phones, microwave ovens etc. can potentially cause dropouts or distorted audio. However, modern systems have improved bandwidths that mitigate most interference issues. Batteries Requirements Wireless speakers also require battery replacements which adds to the long term costs. Rechargeable lithium-ion batteries do help reduce this, but they still need to be charged regularly. You cannot expect weeks of continuous use from wireless surround speakers before charging. This is unlike wired speakers that require no batteries. Wired Surround Sound Systems Reliability of Wired Connections The biggest advantage of wired surround sound systems is reliability. Since the audio signal travels through cables rather than over the air, there is zero chance of interference issues. You can rest assured of clear, pristine surround sound without any dropouts. Wired connections ensure the highest quality reproduction of all those subtle audio effects in movies and games. Future-Proof and Lifetime Usage Well-installed cables will literally last a lifetime if maintained properly. You don't have to replace batteries or buy new wireless speakers every few years as technology advances. A wired surround setup remains future-proof - you can upgrade just the receiver and speakers over time without having to rewire anything. Downside of Cables The downside is, as mentioned earlier, wired systems require much more effort during installation. You have to carefully route various cables around walls, ceiling, floor which is a time-consuming process. It also looks less tidy aesthetically compared to a wireless setup. Moving the speaker system also requires rewiring which makes it less flexible compared to wireless. Comparing Key Aspects Both wired and wireless surround sound systems have their own pros and cons. To summarize the comparison: Convenience - Wireless wins for being much easier to setup and relocate. Sound Quality - Wired has a clear edge with zero interference and more reliable connections. Future-Proofing - Wired remains upgradeable for longer without needing cable runs to be redone. Aesthetics - Wireless appears sleeker without visible cables running all around. Cost - Initial cost of wireless is lower but wired has lower long-term ownership costs without battery replacements. Based on factors like sound quality, future-proofing and reliability, a wired surround sound system makes more sense for serious home theater enthusiasts. However, wireless is a more practical choice for average users who value convenience over top-notch audio. An ideal solution would be a hybrid setup with wired surrounds and wireless rear speakers/subwoofer for best of both worlds. Installing a Surround Sound System Whether going wireless or wired, correct installation is important for maximum performance of the home surround sound system: Speakers must be positioned as per standard THX guidelines for proper directional effects. Ensure ample spacing between speakers to avoid phasing issues. Subwoofer placement against the longest room wall for deep bass distribution. Hide cables neatly under carpets or edge trim for a seamless look if going wired. Use shielded cable for video and audio runs to prevent electromagnetic interference. Test sound levels and do calibration test tones for accurate surround soundfield equalization. Proper installation allows the surround sound system to perform precisely as intended by the engineers. Taking time during this stage rewards with flawless surround audio enjoyment for years to come. Conclusion While wireless offers convenience and simplicity, wired systems provide no-compromise sound quality and reliability that serious home theater enthusiasts demand. For most average users though, a well- installed wireless surround sound system offers an ideal balance of performance and functionality. Choosing between the two requires evaluating individual needs and listening environment to determine which type fits the bill perfectly. With careful research, anyone can enjoy an immersive surround experience with the right surround sound system. |
AuthorAs an audio-visual professional, James Espinosa remains committed to shaping the future of the AV industry. Archives
February 2024
Categories |
 RSS Feed
